Make your own moon phase hanging art or celestial plates out of air dry terracotta clay.
I absolutely love getting crafty with clay at the minute and I am particularly loving using clay in a terracotta colour. I find it so warming and there is something about working with terracotta clay that just seems a bit traditional.
We decided to do a bit of learning at home on moon phases. Yes, that classic Jaffa Cake biscuit eating experiment happened but we also go crafty with a bit of clay. Celestial home accessories seem quite popular at the moment with plaques like Urban Outfitters selling their own cool version of moon phases decorations but after a little Pinterest mooch and a bit of an accumulation of ideas, we decided to make some clay disks and paint the moon phases on to them.
The Recipe
You will need;
White Acrylic Paint
Jump Hoops, String or wire
Circle cookie cutter
I pre-made the clay disks simply with a cookie cutter. I wanted them to be ready to paint by the time we got round to do the activity so I just stood one evening doing them. Having put a hole at the top and bottom I knew that I would either be connecting them to the next disk via wire or string. It turns out I actually ended up using jewellery Jump Hoops, three per join, to connect each disk.
Having done our study on the moon phases, and our biscuit eating experiment we then settled down to paint each phase on a disk. Full moon, half moon, total eclipses and all that were painted onto each disk with child like precision. We just used an acrylic white paint and a clear clay glaze to decorate ours and it has worked really well.
I have also added a tassel to the bottom of our hangings just to jazz them up a bit but for a little project to 'embiggen' learning, this was a lovely thing to do alongside.
After being so happy with how these turned out we actually got the clay out again and we made some clay moons in full and crescent shapes. We actually used these to decorate a simple plate shape that we had rolled out and used one of our own plates as a mould.
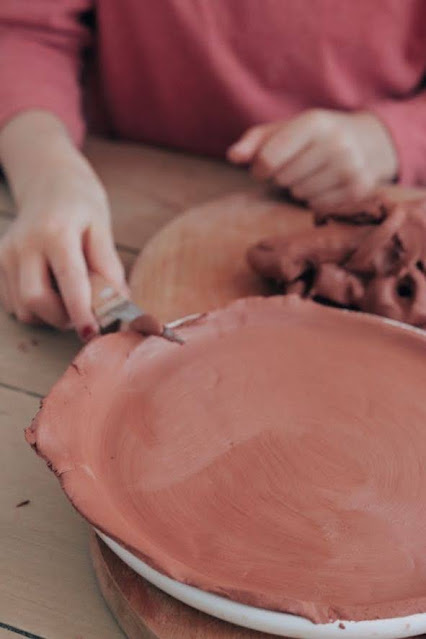
I have done this for a few little projects and it works really well. Make sure you lightly grease your plate to start. Then you can just roll out your clay, cut around it, lay on the plate, trim neatly, and have it ready to decorate. I have learnt to use a damp sponge to smooth your clay, it leaves a more clean finish and also, if you are sticking on shapes like moons, you need a bit of water to fuse the two pieces together.
The moons we made separately using a range of circle cutters. The different sizes lend themselves to the style and once it was dried and glazed these plates genuinely meant something to us. We made them having learnt a bit about the moon. A special keepsake for us.


Great blog on decorative wall plates! Your tips on patterns, placement, and styling are truly inspiring. For unique, artistic, and beautifully handcrafted wall plates, VibeCrafts offers an impressive collection that adds elegance, character, and charm to any wall décor.
ReplyDeleteGreat blog on Decorative Wall Plates! Your ideas on patterns, textures, and placement are very inspiring. For unique, artistic, and beautifully handcrafted wall plates that elevate wall décor, VibeCrafts offers an impressive collection worth exploring.
ReplyDelete