
It is very easy for me to have access for flowers. My mum owns a florist on Steep Hill in Lincoln so I can get my hands on anything. I also have a lot of floristry knowledge which helps greatly when it comes to designs. By no means am I that good but I enjoy it and feel I can make floristry design ideas available to people.
This one was very inspired by a few pictures I saw floating around Pinterest and Instagram.
The idea of using a coathanger with flowers attached for decoration was definately not my idea but I have expanded the ideas I saw to make this.

It is a very simple process which only requires you to have a wire coat hanger (mine were from Primark), scissors, pliers (not necessary if you are strong) and floristry tape, but masking tape will do.
The toughest test is a test of strength in reshaping your coathanger. I don't remember old wire coathangers ever being that tricky to remould but these ones were. I had to use the pliers just to give me grip in pulling and bending them a bit. It is manageable so stick at it!
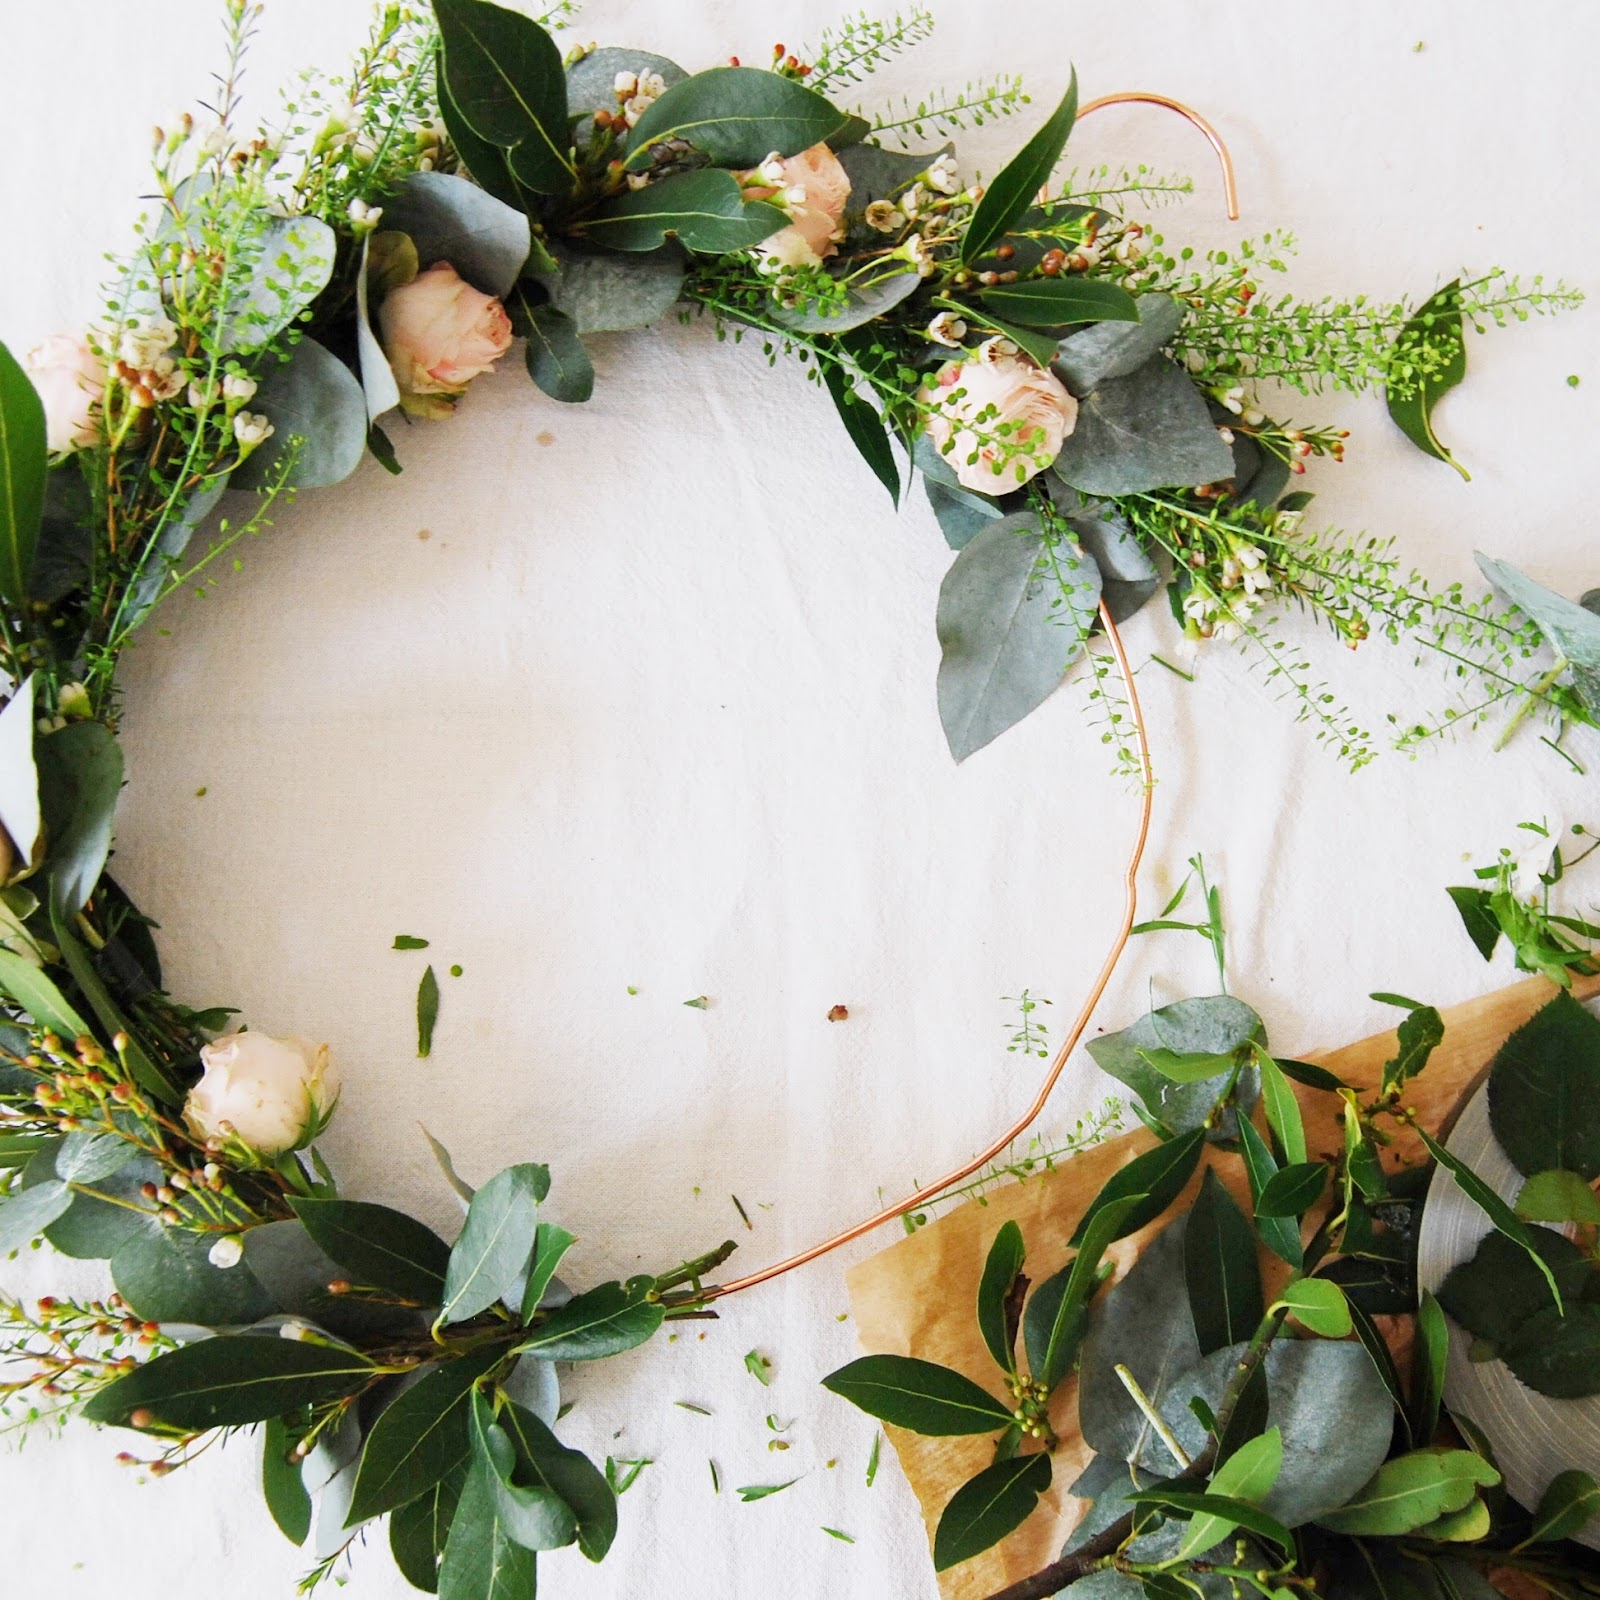
You need to leave the hook as that becomes your hanger.

You then just make it up. Honestly, all the finished results will be so different but it then comes down to you. I had small rose heads, eucalyptus, wax flower and thelaspi. I made simple bundles of either just greenery and wax flower or greenery, wax and rose. I then took each bundle and taped it straight onto the wire coathanger.
One top tip would be to start off-centre so that you have a nice continuous run over where the hanger bit is. (See picture).

Then just keep adding your bundles overlaying them sightly so that you cover each taped bit, moving round the circle.
You will see it begin to take shape and can manipulate leaves spraying out, making that messy, but structured look.

As you begin to reach your starting point you will need to lift up your very first bundle so that you can tuck the last one underneath it allowing the tape to be hidden. It is a bit fiddly but it is worth it to get the continuous flow.
Once it is finished you will have a beautiful display.

Something to point out when taping is that you must pull quite tightly to make it really secure. If you use floristry tape it should not tear, so seriouly, give it a good pull!

Then simply enjoy and hang. With fresh flowers in the wreath it will last less than a week depending on where it is placed. If you just use greenery it should dry nicely and still look nice for a lot longer.


Emily
This looks beautiful and great tips, thank you for sharing. I'm making a fresh wreath this year and have saved hydrangea blooms which are gradually drying a very deep dark purple, so I shall add a sheer ribbon in this colour to finish it off. Have a lovely week!
ReplyDelete